



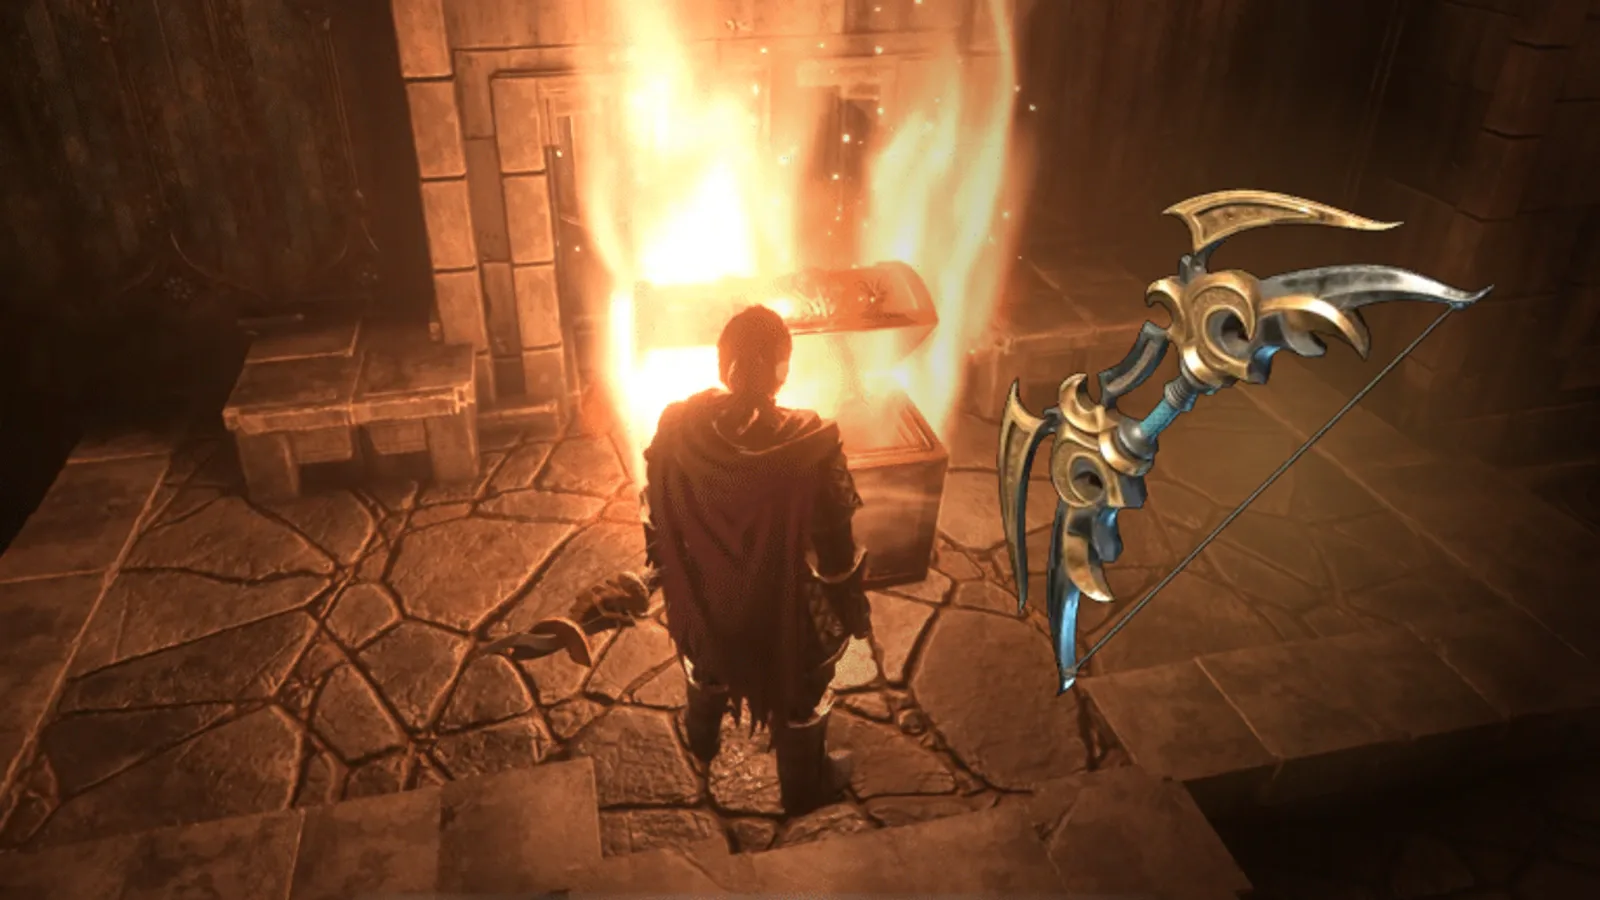


The legendary Dragon’s Wing bow awaits at the end of The Dragons’ Last Breath treasure quest in Enshrouded. Before you can claim it, you must recover four scattered map pieces, find a concealed temple, and set 12 lights correctly. This guide takes you through the entire quest in a practical order.
Prepare for a Practical Route Through the Albaneve Summits
The intended route into the Albaneve Summits requires Flame level 6 and the Ghost Glider crafted at the Carpenter. Then speak to the Flame, travel through the passage from the Nomad Highlands, and complete the Ancient Spire in the Albaneve Summits if possible. This gives you a regional fast-travel point if you need to interrupt the search.
The quest recommends level 28, while enemies around the Forgotten Temple are level 30–32. If combat makes the route unnecessarily difficult, the appropriate world settings for solo and co-op let you adjust the difficulty, among other options.
You do not need to accept the quest from an NPC. It starts automatically when you take any of the four map pieces from its Silver Chest. For the documented PC version, a geographically practical order is Ony → Orpheus → Polaris → Mae. This avoids repeatedly crossing between east and west and leaves you close to the temple, but it is not a timed fastest route: terrain and your glider’s range may make a different path more efficient.
Find All Four Map Pieces in the Silver Chests
Each fragment is fixed chest loot, so you do not need to farm enemies or wait for a random drop. Search for the Silver Chests at these locations:
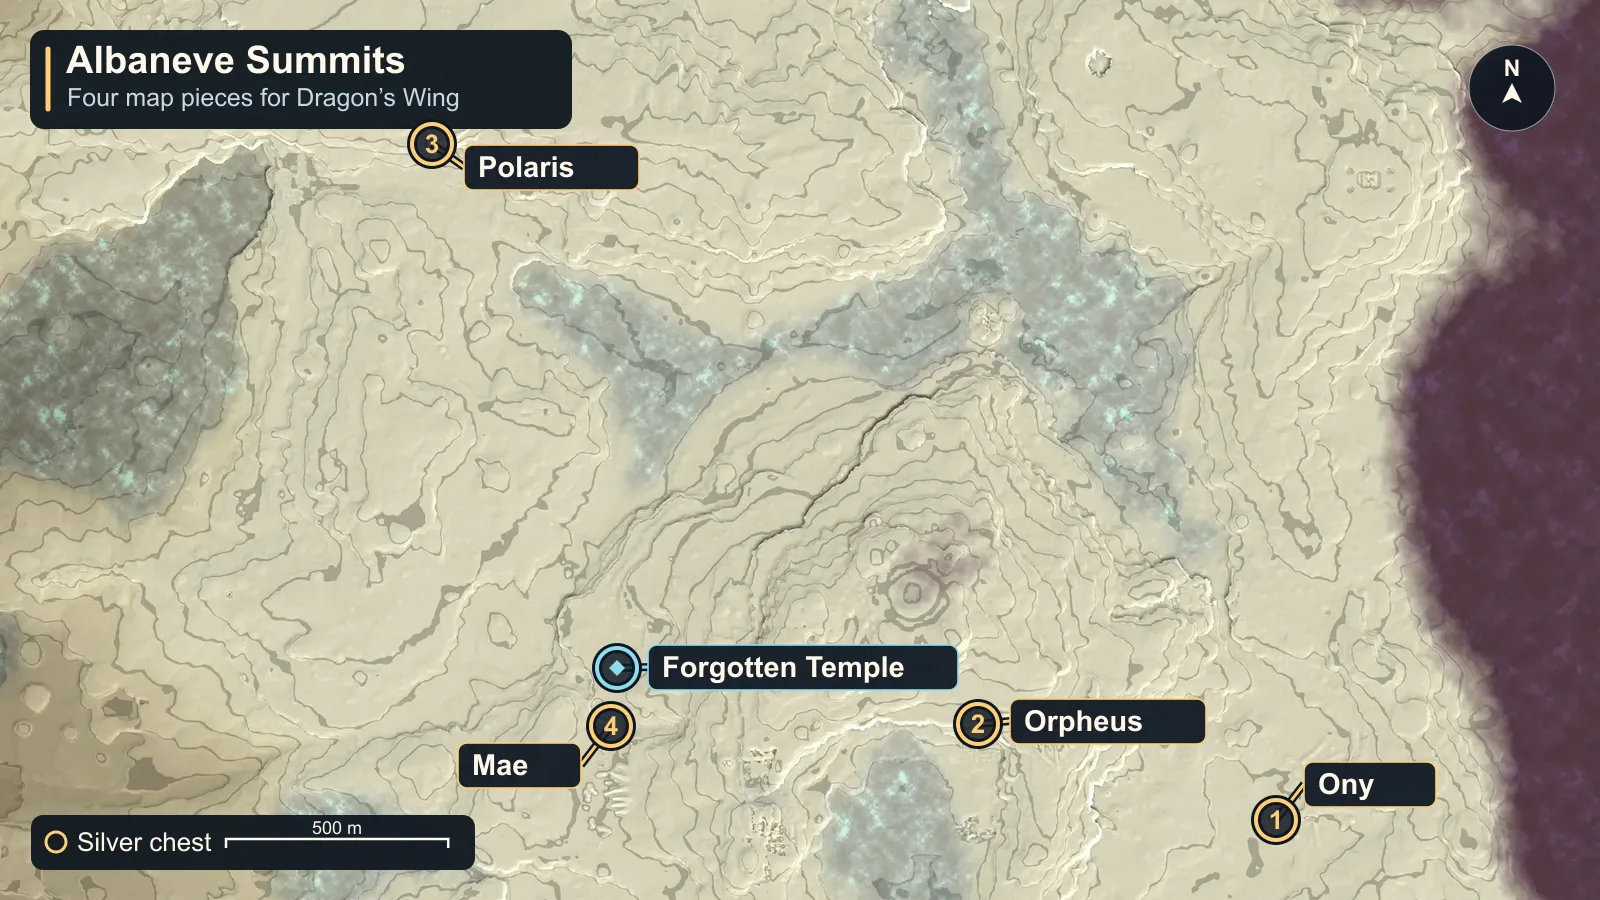
- Ony’s Map Piece: The chest is at X 8,672 / Z 5,545, about 129 meters southwest of the Skeleton Excavation Camp “Ony.”
- Orpheus’ Map Piece: Search at X 8,000 / Z 5,762. The Silver Chest is 74 meters north of the Obsidia Forge, which is the most precise landmark here.
- Polaris’ Map Piece: The chest is at X 6,772 / Z 7,067, directly beside the Giant Skeleton “Polaris.”
- Mae’s Map Piece: The final chest on the recommended route is at X 7,175 / Z 5,757, about 76 meters north of the Skeleton Excavation Camp “Mae.”
The coordinates, distances, landmarks, and route derived from them are documented for the PC version. Whether the locations are identical on PlayStation 5 has not been established, so this guide makes no location recommendation for that platform.
Craft The Dragons’ Map and Find the Temple Entrance
Collecting all four fragments does not complete the next quest step by itself. Open crafting directly from your inventory and combine Mae’s, Ony’s, Orpheus’, and Polaris’ Map Pieces into The Dragons’ Map. You do not need a workbench.
In the documented PC version, the Forgotten Temple is at X 7,189 / Z 5,888. It is only about 207 meters from Mae’s camp, which is why Mae works well as the final stop. If you approach from the Ancient Spire in the Albaneve Summits instead, the destination is roughly 990 meters north. A Builder Obelisk 98 meters away and the “Bora” Gate Outpost 229 meters away provide additional landmarks.
The entrance is near the bottom of a frozen waterfall. Do not search only along the upper cliff edge: descend to the foot of the waterfall and look there for the concealed passage.
Set the 12 Temple Lights Correctly
Inside the temple are four labeled panels for Mae, Ony, Orpheus, and Polaris. Each panel has three lights or switches. Read every panel from left to right and use these settings:
| Panel | Left | Center | Right |
|---|---|---|---|
| Mae | On | Off | Off |
| Ony | On | On | On |
| Orpheus | Off | Off | Off |
| Polaris | Off | On | Off |
The combination follows the treasure hunt’s four poems: Mae refers to the first day, Ony describes a body burning completely, Orpheus calls for no light to remain, and Polaris describes a solitary star. What matters is whether each visible light is on or off, not the apparent physical direction of a switch.
Open the Gold Chest and Confirm Quest Completion
Once all four panels are correct, the treasure chamber opens. Its Gold Chest contains the legendary Dragon’s Wing bow. Do not merely open the chest—move the bow into your inventory, because picking up Dragon’s Wing is the quest’s recorded completion condition.
If the quest or treasure chamber does not respond as expected, check these points in order:
- Nothing happens after collecting four fragments: Craft The Dragons’ Map through inventory crafting.
- The treasure chamber remains closed: Check the name above each three-light panel and compare the visible light states with the table again.
- The quest text remains after looting the chest: First confirm that the bow is actually in your inventory. Logging back in was reported as a possible last resort for an older game version, but it is not confirmed as a general fix for Version 1.0.
0 comments
No comments yet. Start the discussion.
Create an account to comment
Sign in or create a free Guided account to join the discussion.