



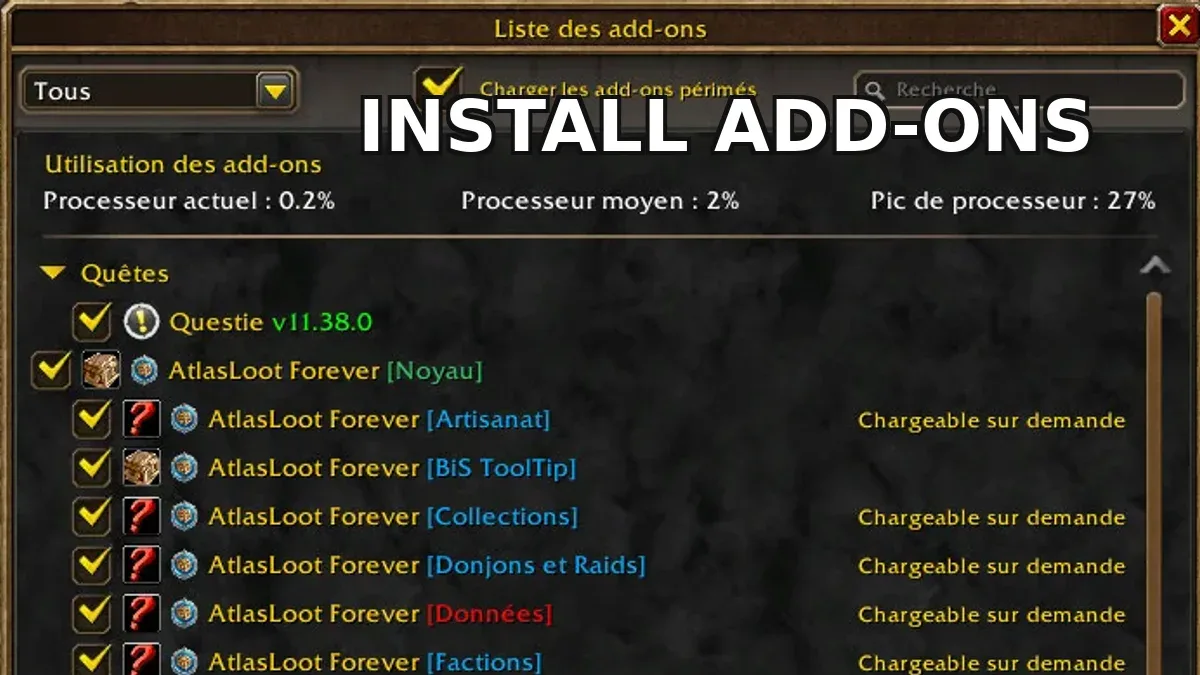


WoW Forever add-ons only work when the file, game version, and installation folder all match. This guide explains both installation methods and helps you fix common problems such as missing entries, incorrectly nested folders, and Lua errors.
Key Takeaways
- Download only files that are explicitly listed for WoW Forever.
- Open the installed client location through Battle.net instead of assuming a folder name.
- For a manual installation, the extracted add-on folders must sit directly inside
Interface/AddOns. - Close WoW completely after copying a new add-on into the folder.
/reloadmay not detect it.
Choose the Correct Add-On File
Check the supported game version for the specific download on the project or file page, not just the add-on’s name. The file must explicitly list “Forever.” A release made for Retail, Classic Era, or another Classic version is not an equivalent substitute.
The “Load out of date AddOns” option does not convert a regular Classic file into a Forever-compatible release. Avoid copying your entire existing Classic add-on collection. Install current Forever versions individually, then test each add-on or small batch before adding more.
Before starting, make sure the Forever client is installed and you have the correct add-on file. The manual method also requires a tool that can extract ZIP archives. If you already have important profiles or settings, back up the WTF folder before making extensive changes.
Find the Correct Forever Folder
Do not rely on a WoW subfolder name copied from an older guide. The safest starting point is the installation location that Battle.net opens for your selected Forever client.
- In Battle.net, select World of Warcraft: Forever or the installed Forever client.
- Open the installation location through the cogwheel beside “Play.” On Windows, the command may be labeled “Show in Explorer,” depending on your launcher language.
- Inside the client folder, open
Interface/AddOns. - If those folders do not exist, create
Interfacefirst and then createAddOnsinside it. Keep that exact nesting.
This prevents you from accidentally installing the files into Retail or Classic Era. The same rule applies on macOS: use the installation location associated with the selected Forever client instead of reusing a path from an older setup.
Install Add-Ons With CurseForge
- Install the Forever client through Battle.net so CurseForge has an existing game location to detect.
- Open World of Warcraft in CurseForge and select Forever rather than Retail or Classic.
- Compare the game path shown in CurseForge with the client folder opened through Battle.net.
- Find the add-on you want and install only its Forever file.
If Forever is missing from the game selection, run “Scan for games” first. If CurseForge still cannot find it, choose “Manually add a game” and select the Forever client folder itself—not the executable file inside that folder. If CurseForge then shows “Game not found” or “This is an invalid directory or unsupported game,” select the Forever installation directory that contains the game’s .exe or .app file. Do not select Interface/AddOns or the executable file itself.
For a “Missing required disk permissions” message, use “Repair folder permissions” from the same menu. If the message remains, check whether antivirus software is blocking CurseForge. On Windows, confirm that your user account has full control of the add-on folder and try running CurseForge as an administrator; on macOS, grant the app the requested folder access. If detection or installation still fails, use the manual ZIP method below.
Install Add-Ons Manually From a ZIP File
- Open the project’s file section and download the release explicitly marked for Forever.
- Extract the ZIP archive completely.
- Copy every included add-on folder directly into
Interface/AddOns. - Close WoW completely, then restart the client.
The actual add-on folder must contain at least one file ending in .toc. A correctly arranged installation could look like this: Interface/AddOns/Leatrix_Plus/Leatrix_Plus.toc.
A path such as AddOns/Questie-12.1.0/Questie/Questie.toc is one level too deep. Move the inner folder up so that only the add-on’s own folder sits between AddOns and its .toc file. Do not place the ZIP archive itself inside AddOns.
Enable the Add-On and Confirm It Loaded
After restarting the client, open the AddOns list on the character-selection screen. If the option is available while you are logged in, you can also reach it through the Escape menu. Enable the add-on and any required dependencies.
If the add-on appears in the list and remains checked, the client has recognized the installation. Next, look for the interface element, minimap button, or slash command documented by the add-on. A folder added while the game was running may not appear after /reload; detecting a newly installed add-on can require a full restart.
Troubleshoot Add-Ons by Symptom
- The add-on is completely missing: Recheck the client folder opened through Battle.net, extract the ZIP file, remove any extra folder level, and confirm that the add-on folder contains a
.tocfile. Restart WoW afterward. - The add-on is marked as out of date: Look for a current Forever file first. Use “Load out of date AddOns” only when the author explicitly identifies that specific file as suitable for Forever.
- Dependencies are missing: Check the project page’s “Relations” or “Dependencies” section. Any included modules must also sit directly under
AddOns. - Errors started after an update: For a manual installation, cleanly replace the old project folder with the new Forever release. This prevents files from different versions from becoming mixed.
- You see Lua errors or a broken interface: Disable every add-on, enable the affected one by itself, and then turn the others back on one at a time. This helps isolate a conflict.
Do not immediately delete your saved settings. Reinstalling an add-on and resetting its configuration are separate measures. A backup of the WTF folder lets you restore profiles if needed.
Check WoW Forever’s Built-In UI Before Adding More Tools
Before installing another interface add-on, check the game’s built-in options. WoW Forever includes equipment management, combined bags, a damage meter, a personal resource display, mouseover and self-casting options, customizable nameplates and group frames, and a Cooldown Manager. Forever also offers additional UI elements that can all be freely moved and repositioned. This makes many popular addons, such as Bagnon and Bartender, largely unnecessary.
Duplicate displays can clutter the interface and create conflicts. Forever also applies modern restrictions to combat data, so a correctly installed add-on may calculate or automate less than a similarly named Classic release.
More WoW Forever Guides
Once your interface is ready, our guide shows you how to earn 16 Legacy Points quickly and choose the right build. Mage players can also learn how to level Comprehension, unlock Study, and use scrolls.

0 comments
No comments yet. Start the discussion.
Create an account to comment
Sign in or create a free Guided account to join the discussion.